

I have the wood hogged out for the prod mortise, so how are all of you getting them nice and square and flat?
Latest topics
» 12th Century Chinese Crossbow Chronographed
by stuckinthemud1 Fri Nov 24, 2023 3:50 pm
» Crossbow Stock
by kenh Tue Oct 31, 2023 6:19 am
» Colletiere a Charavines continuing experiment
by stuckinthemud1 Sat Oct 07, 2023 5:36 am
» Cocking - how
by stuckinthemud1 Thu Aug 03, 2023 4:24 am
» Questions around heavy crossbow lath buildin
by stuckinthemud1 Wed Apr 26, 2023 1:10 am
» Arab Crossbow
by stuckinthemud1 Tue Apr 25, 2023 7:57 am
» prod angle, and lever trigger for sale anyone?
by stuckinthemud1 Mon Mar 20, 2023 5:54 am
» flexible string
by jasper1978 Mon Mar 20, 2023 1:25 am
» [solved]Skane/Lillohus crossbow thread
by stuckinthemud1 Sun Mar 19, 2023 7:44 am
» jens sensfelder
by jasper1978 Wed Mar 08, 2023 11:58 pm
» 400lb Windlass crossbow bolts weight and accuracy shooting high.
by stuckinthemud1 Sun Mar 05, 2023 2:53 pm
» Codex Löffelholz crossbow
by stuckinthemud1 Tue Jan 24, 2023 4:14 pm
» Digitar prodsc
by stuckinthemud1 Sun Jan 15, 2023 2:42 pm
» Troubleshooting
by Andy. Fri Jan 06, 2023 12:29 pm
» Wood Prods
by stuckinthemud1 Fri Dec 30, 2022 12:47 pm
» Colletiere a Charavines crossbow
by stuckinthemud1 Fri Dec 30, 2022 8:54 am
» Simplified Löffelhotz speedloader
by stuckinthemud1 Fri Dec 09, 2022 4:05 pm
» Fiberglass H-bows
by c sitas Sat Nov 12, 2022 8:44 am
» Bad Antler
by drawknife Sat Nov 12, 2022 3:48 am
» Anyone make their own bolts?
by Juniper Mon Oct 17, 2022 8:20 am
» Josef alm in English
by Juniper Sat Oct 15, 2022 4:22 am
» Qin/Han lock drawings
by kenh Fri Sep 23, 2022 8:16 pm
» stirrup dimensions?
by stuckinthemud1 Thu Sep 01, 2022 1:49 pm
» Skane/Lillohus lockbow information needed
by stuckinthemud1 Sun Aug 14, 2022 6:23 am
» need help contacting le musee Dauphinois Grenoble
by stuckinthemud1 Sat Aug 13, 2022 3:22 pm
5 posters
Prod Mortise

Stonedog- Tinkerer
If there is a will, there is a way.

- Posts : 108
Join date : 2012-07-04


mac- Master Weaponsmith

- Posts : 561
Join date : 2010-12-23
Location : Near Philly USA
Here's what I like to do, Stone.
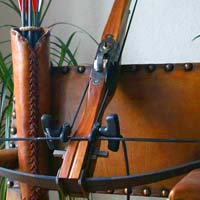
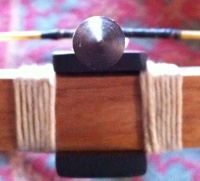
String up the prod and set it into the notch of the tiller with a piece of carbon paper in between. The ink side of the paper must face the wood.
Set the tiller upright on the bench. The prod will be at the top, and the butt of the tiller will be on the bench.
Rig up a sort of stirrup with a leather strap. The strap should have a loop that goes around the string. The stirrup should hang to a convenient height.
Draw the bow by pressing down on the stirrup. The leather loop should be centered on the string. As you draw the bow, watch that the center continues down the middle of the tiller. Take care to keep the tiller vertical! Do not try to draw the bow fully unless you have rigged up some support to keep things stable.....
Disassemble the prod from the tiller and see where the ink from the carbon paper tells you that the prod has been in contact with the wood.
Use your judgment about where the marks are, and whether or not the string drew down the center, to determine where to remove wood.
"Lather, rinse, and repeat" until you are satisfied with the fit and centering. The whole process may take half an hour, or it might take much of the day.
Note: This process will compensate for slightly uneven tillering. of the prod. After all, getting the center of the string to draw down the center of the tiller is the sine qua non.
Mac
Stonedog- Tinkerer
If there is a will, there is a way.
- Posts : 108
Join date : 2012-07-04
Sweet! I have done similar in letting with gun stocks...do you happen to have a pic?
Last edited by Stonedog on Wed Apr 03, 2013 11:26 am; edited 1 time in total
mac- Master Weaponsmith
- Posts : 561
Join date : 2010-12-23
Location : Near Philly USA
A picture!?!?!? Gracious no, sir! While I am performing this stunt, I am hanging on to the tiller with both hands. 
In truth, I'm not much of a "documentarian". It just doesn't occur to me to take pics.
Mac
In truth, I'm not much of a "documentarian". It just doesn't occur to me to take pics.
Mac

jds6- Workshop Savvy
Did you see my tool collection?

- Posts : 197
Join date : 2011-10-18
Age : 61
Location : Dallas,TX
Greetings,
I'm sure there a many different methods of this process. The one I use is quite simple.
First I make a horizontal level line on the wall about 5' from floor and about 30" long. Measuring the prod from nock to nock I then transfer that measurement to the horizontal line with vertical lines.From the two vertical lines I then make two more lines 1" toward the center. Fasten a peg at each mark, now you have a level template for your prod. Secure the prod to the tiller making sure it is centered. Place the prod on top of pegs with the butt of the tiller hanging down. Using a plumb bob and string , tie at nock letting the plumb bob hang down. Now measure the distance from string to center of tiller. This should be the same as center of prod. If the distance is less than center, material from opposite side is to be removed. If greater, material from string side is to be removed.
Just as Mac said, lather, rinse and repeat.
Remember taking off a little material at a time is better, you can always remove more, but you can never add more!
jds6
Hotspur- Workshop Savvy
Did you see my tool collection?
- Posts : 150
Join date : 2012-06-28
Location : British Columbia, Canada
This is how I get 99% there with a drill press:
I make the cut while the tiller sides are still square to the face, prior to removing material or tapering the tiller sides. At this point you can clamp the tiller to a drill press table and get a nice 90’ cut. To avoid the drill wandering out the open side I butt the tiller face up against another block of wood while drilling:
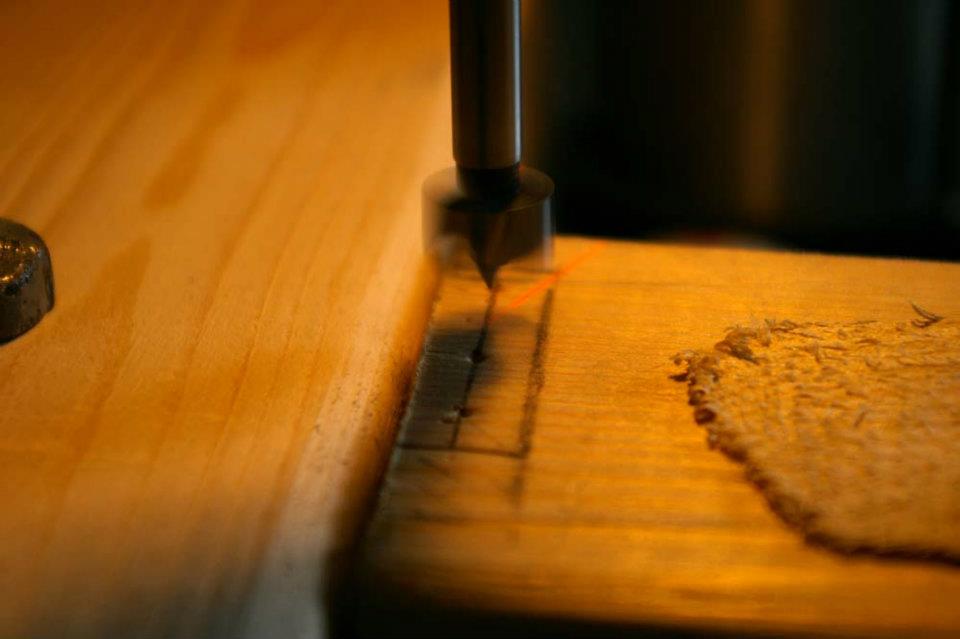

Then clean it up with a chisel...

I make the cut while the tiller sides are still square to the face, prior to removing material or tapering the tiller sides. At this point you can clamp the tiller to a drill press table and get a nice 90’ cut. To avoid the drill wandering out the open side I butt the tiller face up against another block of wood while drilling:
Then clean it up with a chisel...
Stonedog- Tinkerer
If there is a will, there is a way.
- Posts : 108
Join date : 2012-07-04
I did something very similar with my bandsaw ...now just to clean it up with a chisel!
cnunley- Fresh Blood
Doesn't mean
I'm new to crossbows
- Posts : 10
Join date : 2012-10-25
Guys,
This is the way I do it on a table saw. It's fast, accurate and easy.
First you cut the tiller front end to the correct angle on the table saw.
Then you place the tiller in a tenoning jig at the same angle as the face - i.e. the face of the tiller is flat on the table.
Next you set the saw blade to the right height and matching angle.
Finally you pass the tiller over the blade moving it over (the micro adjustment on the jig is perfect for this) slightly each time.
Done in minutes.
Sorry for the quality of the photos, and I am having a hard time getting them to appear in the post. At the very least, here are the links to them. Hope this works.
https://i.servimg.com/u/f70/18/09/24/85/photo_14.jpg
https://i.servimg.com/u/f70/18/09/24/85/photo_17.jpg
https://i.servimg.com/u/f70/18/09/24/85/photo_18.jpg

 Private messages