Process inspired by Serый > Making limbs for a crossbow
Latest topics
» [solved]Skane/Lillohus crossbow thread
by stuckinthemud1 Sat Aug 10, 2024 3:16 pm
» Colletiere a Charavines continuing experiment
by stuckinthemud1 Fri Aug 02, 2024 7:13 am
» What you building?
by hullutiedemies Tue Jul 09, 2024 12:39 am
» 12th Century Chinese Crossbow Chronographed
by stuckinthemud1 Fri Nov 24, 2023 3:50 pm
» Crossbow Stock
by kenh Tue Oct 31, 2023 6:19 am
» Cocking - how
by stuckinthemud1 Thu Aug 03, 2023 4:24 am
» Questions around heavy crossbow lath buildin
by stuckinthemud1 Wed Apr 26, 2023 1:10 am
» Arab Crossbow
by stuckinthemud1 Tue Apr 25, 2023 7:57 am
» prod angle, and lever trigger for sale anyone?
by stuckinthemud1 Mon Mar 20, 2023 5:54 am
» flexible string
by jasper1978 Mon Mar 20, 2023 1:25 am
» jens sensfelder
by jasper1978 Wed Mar 08, 2023 11:58 pm
» 400lb Windlass crossbow bolts weight and accuracy shooting high.
by stuckinthemud1 Sun Mar 05, 2023 2:53 pm
» Codex Löffelholz crossbow
by stuckinthemud1 Tue Jan 24, 2023 4:14 pm
» Digitar prodsc
by stuckinthemud1 Sun Jan 15, 2023 2:42 pm
» Troubleshooting
by Andy. Fri Jan 06, 2023 12:29 pm
» Wood Prods
by stuckinthemud1 Fri Dec 30, 2022 12:47 pm
» Colletiere a Charavines crossbow
by stuckinthemud1 Fri Dec 30, 2022 8:54 am
» Simplified Löffelhotz speedloader
by stuckinthemud1 Fri Dec 09, 2022 4:05 pm
» Fiberglass H-bows
by c sitas Sat Nov 12, 2022 8:44 am
» Bad Antler
by drawknife Sat Nov 12, 2022 3:48 am
» Anyone make their own bolts?
by Juniper Mon Oct 17, 2022 8:20 am
» Josef alm in English
by Juniper Sat Oct 15, 2022 4:22 am
» Qin/Han lock drawings
by kenh Fri Sep 23, 2022 8:16 pm
» stirrup dimensions?
by stuckinthemud1 Thu Sep 01, 2022 1:49 pm
» Skane/Lillohus lockbow information needed
by stuckinthemud1 Sun Aug 14, 2022 6:23 am
+3
Regerald
kiwijim
Ivo
7 posters
Pressing All-fiberglass crossbow limbs
Ivo- Admin
- Posts : 1041
Join date : 2009-11-25
Age : 36
Location : NJ, USA
Images > Сергей (phoenix) > Crossbow limb manufacturing technology
Process inspired by Serый > Making limbs for a crossbow
kiwijim- Tinkerer
If there is a will, there is a way.
- Posts : 62
Join date : 2009-12-10
Thanks for sharing your technique Ivo.
Those are powerful looking limbs you've made there - what draw weight?
I have a couple of questions;
How much resin do you squeeze out during press up?
Do you have any experience with carbon fibre?
Regards
James
Those are powerful looking limbs you've made there - what draw weight?
I have a couple of questions;
How much resin do you squeeze out during press up?
Do you have any experience with carbon fibre?
Regards
James
Ivo- Admin
- Posts : 1041
Join date : 2009-11-25
Age : 36
Location : NJ, USA
Hi,
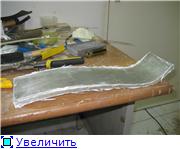
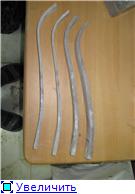
Actually this is not my technology ...it was initially introduced to the Russian forum by Serый and then reproduced by Сергей (phoenix) who was kind enough to take all those pictures. There are links at the top of the page you can check out(it's in Russian, but pictures speak for them selves)
As the authors described the process...The form is insulated by simpy covering everything with clear scotch tape, then either a fiberglass tow is used or a fiberglass cloth is dismantled...then a bunch of fiberglass strands is submerged in resin and excess resin is lightly squeezed through to alow better impregnation with resin (gloves are used). Then these buches are laid into the form and pressed(as illustrated above...by tightening the clamps)...form is set to produce a blank of even thickness through out full length of the limb, but I believe that by tightening the bolts (serving as stops) differently a slight taped can be produced. Once the blank is pressed and fully cured it is cut in half and limbs are given their final shape and taper by wet sanding (to avoid FG dust) or sanded dry(using sufficient evacuation, ventilation, respirator, eye-protection, etc...the list can go on and on depending on equipment)
The two sets of limbs in the picture are 100kg and 40kg in draw weight...100kg had a total of about 800 FG strands laid up in the form and 40kg used about 500. The dimensions of these particular limbs have not yet been made available, but what I do know is that they are 40cm in legth and the crossbow on which these limbs were tested (if I understood the author correctly) has a power stroke of 230мм...
As for carbon fiber...the stuff is better in a laminated limbs(which is probably what most of US bowyers/crossbowmen will make). If you know a little about bows..."while it is drawn - the back stretches while belly compresses". Carbon is very good in stretching(so it goes on the back of the bow well), but terrible in compression(so a fiberglass or some other synthetic material needs to be used on the belly)...as one my fellow crossbow builder gunsmith111 demonstrated in his attempt to make an all-carbon limb for a twinbow like crossbow he is building... the limb did not make it...it snapped in half not even making it past half way of what all-fiberglass limb could easily handle. An unfortunate, but very informative moment...
One for the future...Kevlar ...I thought some might ask about it later so I'll tell you what I know now - as opposed to carbon it is great in compression, but what makes it terrible for crossbow limbs is it decomposes over time loosing it's good qualities...there are more bad things, but you can read more about them on any bulletproof vest
kiwijim- Tinkerer
If there is a will, there is a way.
- Posts : 62
Join date : 2009-12-10
Hi Ivo,
Thank you for your thorough and detailed reply. You have definately filled in all the gaps.
I am very familiar with carbon fibre; and its short comings . I used to use it in laminated longbows, but now do not think it is worth the effort.
The reason I asked about it is because I think it it could be more useful in a pressed fibreglass limb. You could mix carbon tow through the glass at a ratio of, say, 1 part carbon to 3 parts glass. The carbonfibres could have a higher density on the limb back, where they are more useful. The resulting limb would be stiffer, slightly lighter and maybe a bit faster than it's all glass counterpart. Also the carbon component would help dampen shock.
Well thats my theory. Now I need to find the time to test it!
Regards
James
Ivo- Admin
- Posts : 1041
Join date : 2009-11-25
Age : 36
Location : NJ, USA
I've thought about it too. It may be possible to achieve good results by mixing strands of different material, but the setup would be a little on the complex side. A little uneven distribution of forces in a limb and it will most likely twist wen stressed. It would be easier to introduce carbon in form of uni-directional carbon tape to keep things even...kinda like this:
Uni-D carbon tape is laid into the form(assuming the bottom of the form is the future limbs <Back> ) and saturated with resin(or saturated in resin and then laid into the form using a roller)...more layers are added(if needed)...then the fiberglass bundles are saturated in resin and laid over that...and the composite is pressed.
I assume that way there is less chance of uneven distribution of carbon strands through out the composite...perhaps a little more expensive due to use of uni-d tape, but success is worth it. I have the carbon tape, a crap load of fiberglass, and a few different forms ready for testing various designs and techniques, so I'm also half way into testing phase...All that's left is to get my shop cleaned up for "THE DAY"
kiwijim- Tinkerer
If there is a will, there is a way.
- Posts : 62
Join date : 2009-12-10
Hi Ivo,
I'm waiting for the same day!
The way I was thinking of doing it was to use a two post system, let me explain....
The glass and carbon tow would be wrapped around two adjustable posts- just like making an endless string. The posts would be ridged to allow the tow to be distributed evenly up and down the posts with no bunching. Once all the strands are laid up, the jig would be laid on its side on a clean surface and the epoxy would be worked into the strands, prehaps even with a comb. The tow would be wound firmly enough to keep it in place, but not so firmly as too hinder glue saturation. When to all the strands are saturated, the posts would be pulled apart, imparting as much tension as possible to the tow.
This bundle of of pretensioned and glue saturated fibre (still on the jig) would then be turned on its side again, pressed in the form and left to cure.
The action of pressing the bundle will inpart even more tension to the strands in the same way a bridle draws the prod to the tiller.
Does that make sense? I hope I am not just rambling on here!
To incorporate carbon, I would use two jigs.
The first jig would be firstly wound in several layers of carbon tow, then the outer layer of the bundle would be a very fine layer of glass tow. The fine layer of glass means that there is no soft carbon fibre exposed on the back of the limb.
The second jig would be wound thickly with glass tow. This will be the belly.
The two bundles, still on their jigs are placed one on top of the other in the form, pressed together and left to cure
A strip of scrim would be placed in the centre of each bundle to provide lateral stability and resist splitting.
Well thats my theory everyone! It may work, or it may be a dog. I can't comment until it is tested! What I need is a 48 hour day, to get all my projects out of the way
Regards
James
Ivo- Admin
- Posts : 1041
Join date : 2009-11-25
Age : 36
Location : NJ, USA
So I've been thinking and actually loved the idea...we talked about it once with the guys at arbalet.info forum...the reason tow was not used is because guys couldn't get their hands on it easily when fiberglass cloth kits are preactically on every corner so in the end they settled with dismantling the cloth.
I liked your idea a lot...and I'd like to add one little detail
http://sketchup.google.com/3dwarehouse/details?mid=5ab8ca270822a30bd90c105376b9c5d5
I think using little clips(forgot to draw the lock ) to lock in place the tow and keep it from separating while introducing the resin...I'm sure it will also help hold everything together much better while combining with other loops like it and carrying them to the form.
PS: I know the wooden things in my drawing are huge...don't panic....it's an exaggeration.
kiwijim- Tinkerer
If there is a will, there is a way.
- Posts : 62
Join date : 2009-12-10
Hi Ivo,
I'm pleased you understood my ramble! and thankyou for simplifying all my writing with your well executed 3D diagram. I've just down loaded Google Sketch It.
Lets see if I can get my head around it
I like your contribution of the clips. It will make the lay up much easier, and when they are closed, will provide a certain ammount of tension to the fibres.
Regards
James
Regerald- Master Crossbowyer
- Posts : 67
Join date : 2009-11-30
Age : 39
Location : Finland
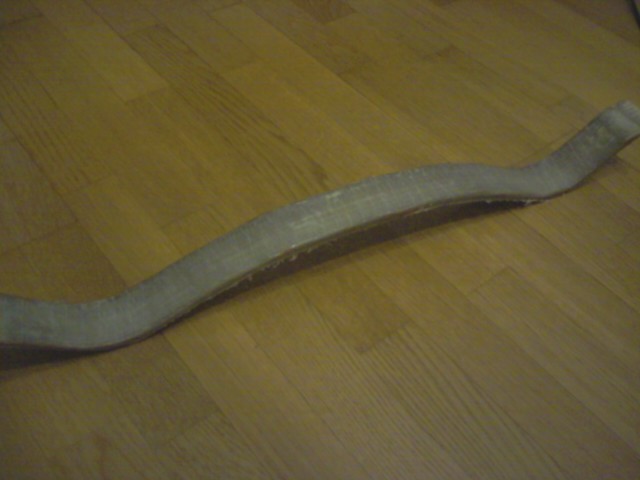
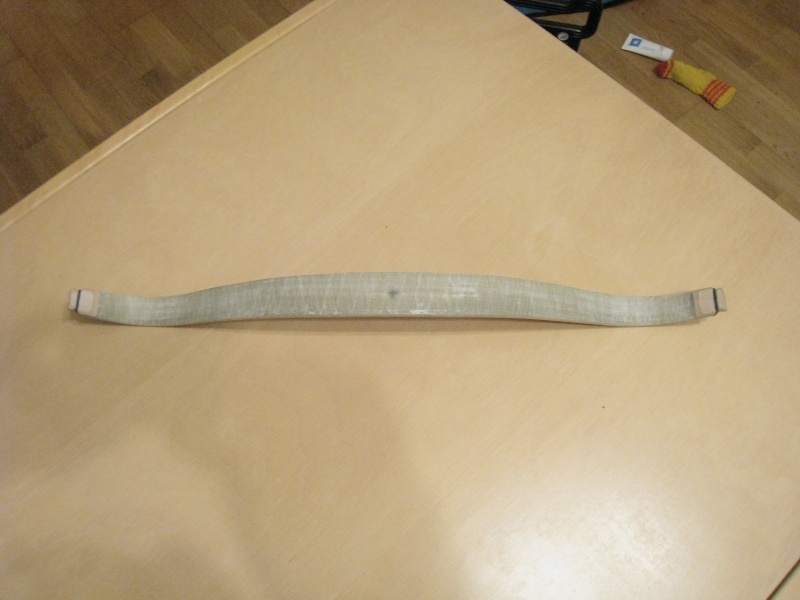
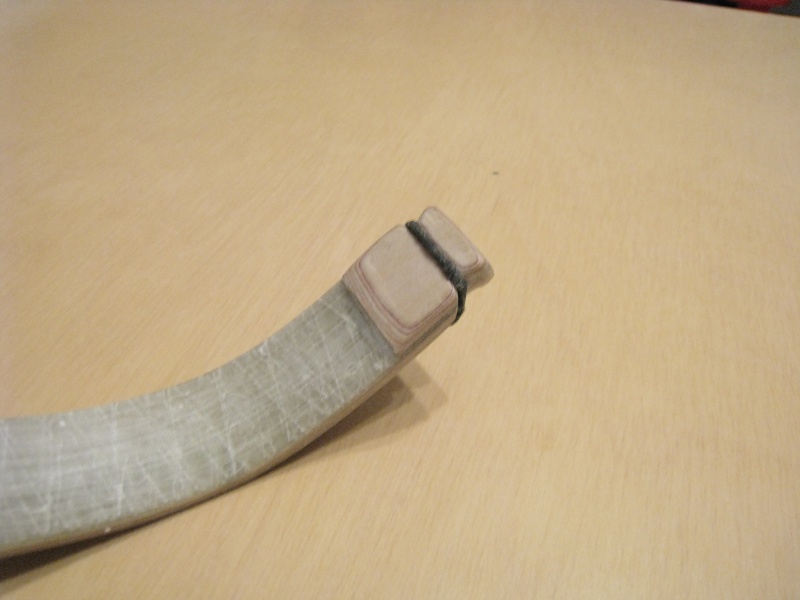
Some picts. how did I make fiberglass prodd using uni-d glass tape and fine modelling plywood as a middle layer.
Ivo- Admin
- Posts : 1041
Join date : 2009-11-25
Age : 36
Location : NJ, USA
Excellent presentation Regerald!
I see your measurements varied slightly from the ones I took from the chinese made 150lb all-fiberglass prod...as well as the technology...you are using wood veneer laminations and uni-d fiberglass tape here. By how much do your measurements vary from the ones here? ...and what draw weight were you able to achieve?
-this model shows a the measurements for a half of a bow...not a single limb
Lastly... Can you please shoe us the full draw picture ...and if it's possible the way you are planing to mount the bow.
Regereald...Просто Супер!
Как я понимаю размеры твоего лука немного отличящтса от тех что я намерял с китайца...и технология тоже немного другая...насколько сильно отличятся твои размеры от моих?...и какая сила натяжения достигаетса при полном натяге?
***3Д***
На последок... если не трудно можно посмотреть как лук выглядит при полной натяжке...ну и конечно же хотелось бы увидеть крепеж.
Sure play with it...go here "Google SketchUp - Not your average CAD" and follow a few link around...download a few models from 3D Warehouse...it's fun yet great tool. Enjoy!
I see your measurements varied slightly from the ones I took from the chinese made 150lb all-fiberglass prod...as well as the technology...you are using wood veneer laminations and uni-d fiberglass tape here. By how much do your measurements vary from the ones here? ...and what draw weight were you able to achieve?
-this model shows a the measurements for a half of a bow...not a single limb
Lastly... Can you please shoe us the full draw picture ...and if it's possible the way you are planing to mount the bow.
Regereald...Просто Супер!
Как я понимаю размеры твоего лука немного отличящтса от тех что я намерял с китайца...и технология тоже немного другая...насколько сильно отличятся твои размеры от моих?...и какая сила натяжения достигаетса при полном натяге?
***3Д***
На последок... если не трудно можно посмотреть как лук выглядит при полной натяжке...ну и конечно же хотелось бы увидеть крепеж.
kiwijim wrote:...I've just down loaded Google Sketch It.
Lets see if I can get my head around it ...
Sure play with it...go here "Google SketchUp - Not your average CAD" and follow a few link around...download a few models from 3D Warehouse...it's fun yet great tool. Enjoy!
Regerald- Master Crossbowyer
- Posts : 67
Join date : 2009-11-30
Age : 39
Location : Finland
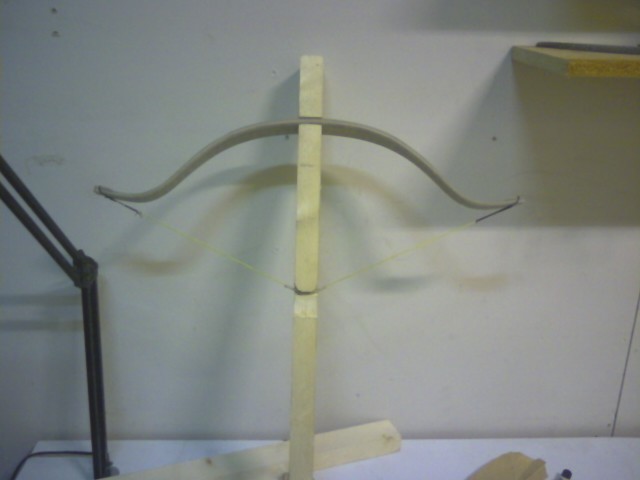
Here is full-draw image.. It seems like edges of a prod have to be little thinner, next time I will make better shape =)
This prod is 58cm (23'') cross-section in the middle is 38/10mm (1.52''/0.4'') and 25/5.5mm (1''/0.22'') at the edges. Draw weight is about 130 lbs with a 7'' draw distance.
Current string is little bit too loose, it wasn't designed for this limbs. Here it's just for testing..
kiwijim- Tinkerer
If there is a will, there is a way.
- Posts : 62
Join date : 2009-12-10
Hi Regerald,
I really like the profile of this prod . Also, I like how you've used a wood core to reduce limb mass. It must be fast!
Regards
James
I really like the profile of this prod . Also, I like how you've used a wood core to reduce limb mass. It must be fast!
Regards
James
Regerald- Master Crossbowyer
- Posts : 67
Join date : 2009-11-30
Age : 39
Location : Finland
Yes, overall weight is only 200g, (0.44 lbs), so I predict it must be a fast one.. But on other side, this wood veneer seems to be a "weak point". So I would advice to use some hard wood laminates (for example maple) or fiberglass laminates, it will give a better reliability.
Ivo- Admin
- Posts : 1041
Join date : 2009-11-25
Age : 36
Location : NJ, USA
Thanks for the answer.
The profile is great even with the recurved tips sticking out so much...makes me think of "static recurves" ...thou may be a "perversion" and not something I would recommend , but adding a "string bridge" like on old Mongolian horse bows would be an interesting experience.
I also agree on using maple...many bowyers recommend it for well performing bows.
Also....making a laminate from maple(using epoxy and hot box) will make it into what is called "action wood" ...something I'm dreaming of pressing in my little shop.
Ivo- Admin
- Posts : 1041
Join date : 2009-11-25
Age : 36
Location : NJ, USA
Very good read...enjoy
Yanked from Grodon Composites website...link
Imagine
doing more than a million deep knee bends without getting tired.
That may be out of the question but the common thread that runs through
all of our products is their ability to withstand deep deflection over
numerous cycles without fatigue or loss of performance.
FEA Deflection demonstration
testhero- Fresh Blood
Doesn't mean
I'm new to crossbows - Posts : 30
Join date : 2010-11-08
One solution to Locking in place your Composite Carbon - fibre fibreglass tow would to be to weave it togeather. Your "carbon tow would be wrapped around two adjustable posts- just like making an endless string. The posts would be ridged to allow the tow to be distributed evenly up and down the posts with no bunching." Is a primitave continous loom. with that set up all you need is a Shuttle and a fair chunk of time. AS I understand your needs you wouldnt have to weave the entire length of the tow just put a few throws of weft at even intervals. If you wanted to build a loom you could weave the whole length for further stiffness or even weave the two Materials of Tow togeather.
kiwijim- Tinkerer
If there is a will, there is a way.
- Posts : 62
Join date : 2009-12-10
Hi there Testhero,
Ivo and I had a bit of a discussion about this a while ago
Here are a couple of posts from our discussion:
Ivo and I had a bit of a discussion about this a while ago
Here are a couple of posts from our discussion:
kiwijim wrote:Hi Ivo,
I'm waiting for the same day!
The way I was thinking of doing it was to use a two post system, let me explain....
The glass and carbon tow would be wrapped around two adjustable posts- just like making an endless string. The posts would be ridged to allow the tow to be distributed evenly up and down the posts with no bunching. Once all the strands are laid up, the jig would be laid on its side on a clean surface and the epoxy would be worked into the strands, prehaps even with a comb. The tow would be wound firmly enough to keep it in place, but not so firmly as too hinder glue saturation. When to all the strands are saturated, the posts would be pulled apart, imparting as much tension as possible to the tow.
This bundle of of pretensioned and glue saturated fibre (still on the jig) would then be turned on its side again, pressed in the form and left to cure.
The action of pressing the bundle will inpart even more tension to the strands in the same way a bridle draws the prod to the tiller.
Does that make sense? I hope I am not just rambling on here!
To incorporate carbon, I would use two jigs.
The first jig would be firstly wound in several layers of carbon tow, then the outer layer of the bundle would be a very fine layer of glass tow. The fine layer of glass means that there is no soft carbon fibre exposed on the back of the limb.
The second jig would be wound thickly with glass tow. This will be the belly.
The two bundles, still on their jigs are placed one on top of the other in the form, pressed together and left to cure
A strip of scrim would be placed in the centre of each bundle to provide lateral stability and resist splitting.
Well thats my theory everyone! It may work, or it may be a dog. I can't comment until it is tested! What I need is a 48 hour day, to get all my projects out of the way
Regards
James
Ivo wrote:So I've been thinking and actually loved the idea...we talked about it once with the guys at arbalet.info forum...the reason tow was not used is because guys couldn't get their hands on it easily when fiberglass cloth kits are preactically on every corner so in the end they settled with dismantling the cloth.
I liked your idea a lot...and I'd like to add one little detail
http://sketchup.google.com/3dwarehouse/details?mid=5ab8ca270822a30bd90c105376b9c5d5
I think using little clips(forgot to draw the lock ) to lock in place the tow and keep it from separating while introducing the resin...I'm sure it will also help hold everything together much better while combining with other loops like it and carrying them to the form.
PS: I know the wooden things in my drawing are huge...don't panic....it's an exaggeration.
kiwijim- Tinkerer
If there is a will, there is a way.
- Posts : 62
Join date : 2009-12-10
Sorry testhero,
Just read your post and relised that you had already read the two I just posted.
BTW, where in NZ are you?
Just read your post and relised that you had already read the two I just posted.
BTW, where in NZ are you?
benblaquemagic- Fresh Blood
Doesn't mean
I'm new to crossbows - Posts : 3
Join date : 2011-07-09
Location : Branson, Missouri, USA
do you have these instructions in english? thank you
sairaj999- Fresh Blood
Doesn't mean
I'm new to crossbows - Posts : 19
Join date : 2012-05-15
Age : 33
Location : india
Hi Regerald,
I like ur fiberglass prod im making one crossbow but i want to make with fiberglass and i have fiberglass tape but one question is to ask u did u use wood in middel of fiber glass if yes than how many stripes of wood and of fiberglass u have used i want to make one cross bow that i was planing from 1 year but i cant make it because of i want to make prod..... thx u very much
Ivo- Admin
- Posts : 1041
Join date : 2009-11-25
Age : 36
Location : NJ, USA
Not an all fiberglass prod and neither is Regerald's, but if you're in US, an easier route would be to use pre-preg fiberglass laminations. There is a pretty good picture packed tutorial by teagus on a laminated limb here > Link (wonder what happened to that dude )
Also there are some notes on TheCrossbowman's Den site >
http://www.thecrossbowmansden.com/Hints_%26_Tips/Entries/2006/3/5_Prodd_Laminating_Press.html
http://www.thecrossbowmansden.com/Hints_%26_Tips/Entries/2006/2/5_About_building_the_Prodd.html
Ivo
Also there are some notes on TheCrossbowman's Den site >
http://www.thecrossbowmansden.com/Hints_%26_Tips/Entries/2006/3/5_Prodd_Laminating_Press.html
http://www.thecrossbowmansden.com/Hints_%26_Tips/Entries/2006/2/5_About_building_the_Prodd.html
Ivo
sairaj999- Fresh Blood
Doesn't mean
I'm new to crossbows - Posts : 19
Join date : 2012-05-15
Age : 33
Location : india
hi hello i want to ask one question that what was size of prod wood you used and how many layers of wood and fiberglass u useRegerald wrote:Some picts. how did I make fiberglass prodd using uni-d glass tape and fine modelling plywood as a middle layer.
Ivo- Admin
- Posts : 1041
Join date : 2009-11-25
Age : 36
Location : NJ, USA
I will try to answer your question my way, since answering it directly won't really make your life any easier.
Earlier, when the above tutorial was posted, we discussed the dimensions of the prod. (exactly what you are after)
Regerald wrote:
So the answer to your question would be - measure the thickness of your tape, measure the thickness of wood veneer available to you, and do the simple math of stacking the measurements to match Regerald's dimensions.
As you can see I wasn't being depreciative towards you when I said - Go read these topics. even Regerald himself pointed you back to this topic. In the future, if you're hintend in the direction of the answer...don't hesitate to dig.
So you have your answer now...guess the rest is...
Simple?
Well, not so much...
You still need to tiller the bow after you press a prod blank.
What is "Bow Tillering"? Well that's something you need to research, understand, and most importantly become proficient at, if you plan to make your own prod. Tillering is a skill acquired with experience and thus can't be taught over a cup of tea.
I've mentioned this to many people here: Before taking up crossbow building, you need to have at least the basic knowledge of traditional bow making to have any chance in this trade.
Most people start out by purchasing parts and building their crossbows using these bought parts. However, as soon as they say - "I'm going to build those parts myself", that's when things get serious and they realize that they should have listened to their physics/chemistry teachers while still in school.
You went straight for the advanced stuff. So don't expect things to be easy. My advice - research bow building (traditional wood bows, laminated bows, composite and other technologies involved in archery) while working on your prod design. I promise - it will make your life so so so much easier...especially when asking questions - It's a much greater pleasure to answer a questions stated by a person who has some knowledge vs. by the one with little or no knowledge.
I wish you luck on your journey to build a crossbow of your dreams,
Ivo
Earlier, when the above tutorial was posted, we discussed the dimensions of the prod. (exactly what you are after)
Regerald wrote:
Regerald wrote:
Here is full-draw image.. It seems like edges of a prod have to be little thinner, next time I will make better shape =)
This
prod is 58cm (23'') cross-section in the middle is 38/10mm
(1.52''/0.4'') and 25/5.5mm (1''/0.22'') at the edges. Draw weight is
about 130 lbs with a 7'' draw distance.
Current string is little bit too loose, it wasn't designed for this limbs. Here it's just for testing..
So the answer to your question would be - measure the thickness of your tape, measure the thickness of wood veneer available to you, and do the simple math of stacking the measurements to match Regerald's dimensions.
As you can see I wasn't being depreciative towards you when I said - Go read these topics. even Regerald himself pointed you back to this topic. In the future, if you're hintend in the direction of the answer...don't hesitate to dig.
So you have your answer now...guess the rest is...
Simple?
Well, not so much...
You still need to tiller the bow after you press a prod blank.
What is "Bow Tillering"? Well that's something you need to research, understand, and most importantly become proficient at, if you plan to make your own prod. Tillering is a skill acquired with experience and thus can't be taught over a cup of tea.
I've mentioned this to many people here: Before taking up crossbow building, you need to have at least the basic knowledge of traditional bow making to have any chance in this trade.
Most people start out by purchasing parts and building their crossbows using these bought parts. However, as soon as they say - "I'm going to build those parts myself", that's when things get serious and they realize that they should have listened to their physics/chemistry teachers while still in school.
You went straight for the advanced stuff. So don't expect things to be easy. My advice - research bow building (traditional wood bows, laminated bows, composite and other technologies involved in archery) while working on your prod design. I promise - it will make your life so so so much easier...especially when asking questions - It's a much greater pleasure to answer a questions stated by a person who has some knowledge vs. by the one with little or no knowledge.
I wish you luck on your journey to build a crossbow of your dreams,
Ivo
sairaj999- Fresh Blood
Doesn't mean
I'm new to crossbows - Posts : 19
Join date : 2012-05-15
Age : 33
Location : india
hi only one question pleas tell me which type of wood you use for prodsairaj999 wrote:hi hello i want to ask one question that what was size of prod wood you used and how many layers of wood and fiberglass u useRegerald wrote:Some picts. how did I make fiberglass prodd using uni-d glass tape and fine modelling plywood as a middle layer.
Ivo- Admin
- Posts : 1041
Join date : 2009-11-25
Age : 36
Location : NJ, USA
The fastest and snappiest of laminated crossbow prods are made with Morning Wood. And all the wood work should be performed by a qualified wood worker to insure that every shot is a blast.
Actually I wonder ...how many veneers can one cut before going into shock! ...not to mention planing and grinding them to taper.
Ivo
Actually I wonder ...how many veneers can one cut before going into shock! ...not to mention planing and grinding them to taper.
Ivo